Did you know the average American family spends over $500 annually on children’s furniture that often gets outgrown in just two years?
There’s a better way. Creating handmade pieces for your children is a rewarding adventure. It blends creativity with practical function to transform their spaces.
This approach lets you craft unique items that fit your child’s needs perfectly. They can match your home’s style without the high cost of store-bought options.
Whether you’re new to tools or an experienced maker, there are builds for every skill level and budget. Simple weekend projects or more elaborate creations await.
From charming table sets for art time to smart storage that tames toy chaos, the possibilities are vast. This guide will help you make functional, colorful, and personalized spaces for your little ones.
Get ready to feel the satisfaction of building something yourself. Watch their faces light up and enjoy durable, custom pieces that last for years.
Key Takeaways
- Handmade children’s furniture can save money compared to frequently replaced store-bought items.
- Custom creations offer a perfect fit for your child’s needs and your home’s decor.
- Projects are available for all skill levels, from beginner to experienced.
- Building yourself results in unique, personalized pieces with lasting value.
- Functional and fun options range from play tables to organizational storage solutions.
- The process is a rewarding experience that brings joy to both you and your child.
Overview & Benefits of DIY Kids Furniture
Crafting items for your little ones isn’t just about saving cash. It’s an investment in quality, fit, and family connection. You gain control over every detail, from the wood you choose to the final splash of color.
Understanding the Value of Handmade Pieces
Store-bought options often don’t fit unique spaces. A custom-built piece solves this problem perfectly. You can make it the ideal size for a small bedroom or a tricky corner.
You also select all the materials. This ensures a safe, non-toxic finish for your child. The result is a sturdy item that lasts for years, not a flimsy alternative.
| Feature | Handmade Creations | Store-Bought Items |
|---|---|---|
| Fit & Size | Custom-built for your space | Limited standard sizes |
| Materials & Safety | You control the quality and finish | Materials and chemicals can be unknown |
| Long-Term Value | Can be adapted as needs change | Often outgrown or discarded |
Boosting Creativity and Family Bonding
Working on a project together is powerful. It turns a simple build into a shared adventure. Your children learn practical skills and feel immense pride in the result.
The process of making something together builds more than just furniture. It builds confidence, patience, and wonderful memories.
This hands-on time is priceless. It encourages problem-solving and sparks joy. You create a special piece and lasting memories in one fun way.
DIY Kids Furniture Ideas
Transforming a corner of your home into a functional play area starts with a few simple builds. Let’s explore two popular categories that offer great results.
These creations provide dedicated spots for activities and help keep belongings organized.
Easy Table and Chair Projects
Beginner-friendly sets are a fantastic place to start. Use simple pocket hole joinery to attach legs securely.
Consider a hinged top that lifts to hide clutter inside. A toybox lid support keeps it safe for little fingers.
A convertible toddler set can adapt into many configurations. It grows with your child through different stages.
| Project Type | Key Feature | Best For |
|---|---|---|
| Table & Chair Sets | Pocket hole construction; customizable heights | Homework, art, and play areas |
| Hinged-Top Table | Hidden interior storage compartment | School-aged children needing organization |
| Convertible Toddler Set | Multiple configurations (up to 27 uses) | Montessori-style learning and play |
Creative Storage and Space Solutions
Smart organization is key in any child’s room. A mobile lego table with fold-away sides saves precious space.
It includes shelves to keep all those tiny bricks sorted. Colorful crates are another easy win for toy storage.
Let your little ones help paint them for a personal touch. For outdoor fun, a sturdy sensory table holds bins of water or sand.
This provides hours of engaging play on a summer day. Each project maximizes your available area cleverly.
Detailed Project Guides and Inspiration
From sunny backyard picnics to creative indoor art stations, these project guides provide the blueprint for building memorable pieces. They offer clear steps and material lists to turn your vision into a reality.
Picnic Tables and Playroom Tables
A classic kid-sized picnic table is a wonderful first project. Use 2×4 lumber cut for legs and seats. Cedar boards resist weather beautifully.
Pocket hole joinery makes it sturdy. You can build one for under $100. For more fun, add a nautical theme with portholes cut by jigsaw.
Inside, a playroom table with rolling storage cubes is a genius design. It creates seating and hides toys. This clever solution maximizes your play space.
Art Centers and Craft Tables
Inspire creativity with a dedicated art center. A pine tabletop offers a large work surface. Add round dowels to hold paper rolls and books.
An activity table made from 1×6 boards is very sturdy. It’s perfect for drawing or games. For extra storage, tuck mini chests underneath.
Giving a child a dedicated space to create is a gift that keeps on giving—it organizes the mess and fuels their imagination.
Special Projects for Bedrooms and Outdoor Areas
Small bedroom? A wall-mounted drop-down table is brilliant. It folds away when not needed. This saves so much floor area.
A house-shaped play table adds whimsy. Flip the plywood top for different activities. For shared sleepovers, triple bunk bed plans are fantastic.
Don’t forget a play kitchen made from scrap wood. It sparks hours of imaginative play. Each piece adds personal decor to the room.
| Project Type | Best For | Key Feature | Material Tip |
|---|---|---|---|
| Picnic Table | Backyard snacks & playdates | Weather-resistant, communal seating | Use cedar 2x4s for longevity |
| Art Center | Drawing, crafts, homework | Integrated paper roll & book holder | Pine craft board for a smooth top |
| Wall-Mounted Table | Small rooms, tight spaces | Folds up to free floor space | Ensure wall anchors are secure |
| Play Kitchen | Imaginative role-play | Customizable with paint & hardware | Repurpose scrap lumber for doors |
Tips for Safe and Durable Construction
Building pieces that are both safe and built to last requires careful attention to materials and finishing techniques. Following these guidelines ensures your creations are secure and will withstand years of joyful use.
A great final product starts with smart choices at the very beginning.

Choosing Child-Friendly Materials
Selecting the right wood is your first critical step. Softwoods like pine are easy to work with and take paint well. For outdoor projects, cedar lumber naturally resists rot.
Plywood sheets offer incredible versatility for tabletops and shelves. Always opt for sanded plywood to minimize initial sanding time.
| Material Type | Best For | Key Feature | Safety Note |
|---|---|---|---|
| Pine Boards | Indoor tables, chairs, shelves | Easy to cut, accepts stain evenly | Ensure it’s knot-free for stability |
| Cedar Lumber | Outdoor picnic sets, play structures | Natural weather resistance | Requires less chemical treatment |
| Plywood Sheets (4×8) | Large tabletops, cabinet boxes | Strong, stable, and cost-effective | Sand exposed edges thoroughly |
Finishing Touches for Longevity
Your sanding work is non-negotiable. Run your hands over every surface and edge after sanding. This finds any hidden rough spots.
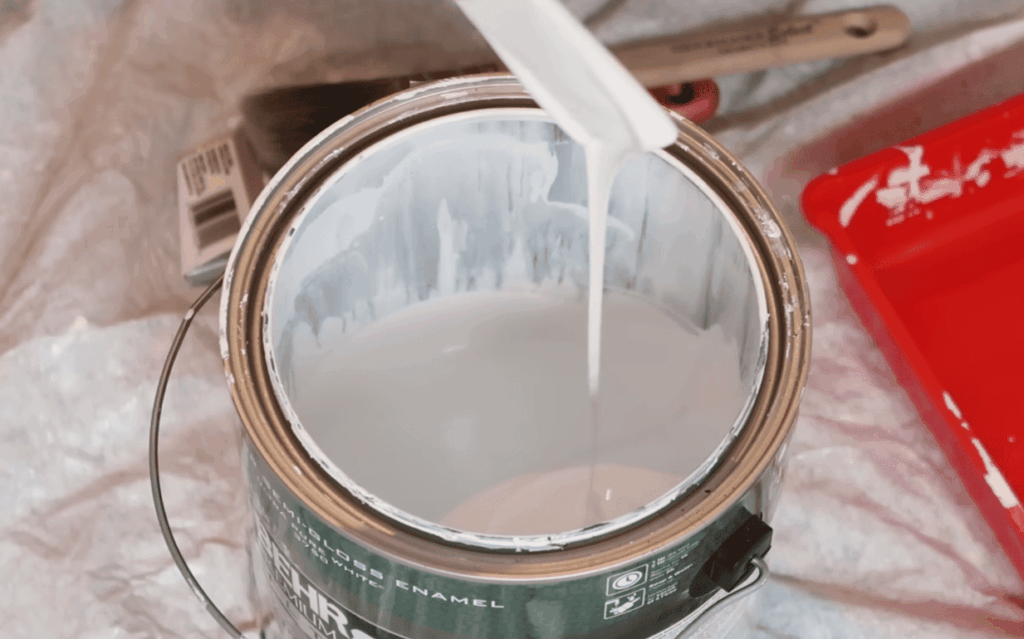
Fill all nail holes with wood filler before applying any finish. When painting, use several light coats for a tough, even layer. Let your child help with sanding smooth surfaces—it’s a safe and fun job.
The final seal is what protects your hard work. Use polyacrylic for indoor pieces to guard against spills. For outdoor furniture, polyurethane provides a shield against sun and rain.
These steps transform a simple build into an heirloom-quality piece for your kid.
Enhancing Your Kid’s Room with DIY Touches
A child’s room becomes truly their own when you infuse it with personalized details and thoughtful design. This final phase is where function meets personality, creating a cohesive and special space.
Personalizing with Color and Decor
Color choice makes an enormous impact. Letting your little one pick their favorite colors for a project empowers them. They will cherish the finished piece more.
Bright, cheerful tones energize a play place. Softer hues create a calm bedroom for rest. A simple table transforms with painted stripes or fun polka dots.
Personalized labels turn basic crates into smart storage. Mark them for “Legos” or “Books“. This teaches organization skills and gives every toy a home.
Coordinate the finish with your existing room decor. Match a painted bookshelf to the wall color. Or choose a natural stain for a rustic look.
Display shelves serve double duty. They organize books and showcase treasured things like stuffed animals. Wall-mounted options save precious floor space in a small room.
These thoughtful design choices create an intentional retreat. Your child feels ownership and pride in their special space.
Conclusion
The journey of creating custom pieces for your child’s space offers rewards that extend far beyond the final build. It’s a rewarding way to craft a personalized home environment for your little ones. You develop practical skills and enjoy quality time together as a family.
From simple table and chair sets to clever storage solutions, each project adds unique charm. The beauty lies in total customization—you control the design, colors, and size to fit your space perfectly.
These furniture projects are enjoyable for all skill levels. With a good plan, even a straightforward build yields professional results. Blend your handmade creations with your existing decor for a cohesive place.
So gather your tools and pick a first step. The satisfaction of building something yourself makes every moment worthwhile. Happy crafting!